How-To Guides
Before you start on your DIY Lawn you’ll need to work out what materials you need to order and purchase. You will first need to measure up your space, always measure in metres as you are looking for a final measurement in metres squared (m2). Below are some tips on measuring for both instant and artificial lawn.
Some lawn areas are straight forward as they are a clear single shape, however other areas may be a combination of shapes (e.g. a square and a circle). Below are some suggestions regarding different shapes and how to measure to ensure you get the most accurate number for ordering your lawn. If you do have an irregular shaped lawn area, divide it into regular shapes, calculate the individual area of those shapes and add them together to get an overall measurement.
SQUARE /RECTANGLE/ OVAL:
For a square, rectangle or oval, you need to multiply the length by the width.
Formula: L x W = m2.
Example: If a lawn has a length of 6 metres and a width of 15 metres you need to multiply 6 by 15.
Sum: 6 x 15 = 90m2.
CIRCLE:
Alternatively, if your lawn is a circular shape, measure the diameter (length from one side to the other). Divide the diameter by 2 to get the radius (R) of the circle. Using the radius, complete the following formula to get the area of your circle.
Formula: R x R x 3.14 = m2.
For example, if your circle has a diameter of 13 metres, the radius is 6.5 metres and the sum below is needed to work out the area of your circle.
Sum: 6.5 x 6.5 x 3.14 = 132.7m2.
TRIANGLE:
To calculate the area of a triangle, measure the base and one side of the triangle. You will need to multiply the base (B) by the side (S) and divide it by two to get the overall area.
Formula: B x S / 2 = m2.
For example, if your lawn has a base of 16 metres and a side of 9 metres the sum below would be required to work out the area of your triangle.
Sum: 16 x 9 / 2 = 72m2.
PLEASE NOTE:
It is advisable to allow extra turf when ordering as you will have some wastage, especially if your lawn is of an irregular shape.
Know the size of your panels when ordering artificial turf so that you do not have to cut them any more than needed.
We are often asked questions on the best turf type for a particular area, or how to lay turf as a DIY Lawn option. Below is the common advice we give to customers. If you find this does not answer your questions, please feel free to give us a call on 8326 3255 to discuss.
PRE-PREPARATION
We strongly suggest that you spray off existing weeds and growth first before starting to prepare to lay your turf. We recommend a glyphosate-based weed killer, making sure you wear appropriate safety gear. Invest in a spray pack, ensure when you have finished with it to wash it out well.
CHOICE OF TURF
When choosing your turf for your DIY Lawn project, it is important to consider a few options as the answer will affect what turf works best.
- How much sun the area will get.
- The growing climate.
- What wear and tear you expect on the area.
- Your budget.
- Aesthetics and what level of maintenance you are wanting to do.
We are more than happy to talk through the best turf for your situation on the phone, in person, or alternatively we have information on each turf in the Natural Lawn section of this website.
SOIL PREPARATION. LAYING AND WATERING
To best prepare for laying turf it depends on type of soil you have and if pH is suitable. Generally, we recommend you remove soil down to 100mm deep, rotary-hoe the base adding in some gypsum, organic matter or organic fertiliser, or our soil conditioning fertiliser. Follow this by leveling off and infilling with a good loam such as Mt Compass Turf mix or Sandy loam (depending on your existing soil 80/20 or 60/40 mix). Rake and roll it to get level, leaving about 3 -4cm below the height you want to allow for your turf. If it is a hot day, you must water the ground well before you lay the turf and then soak the turf when you lay it and roll it again. Lay it like bricks working from one side to another, leaving the cuts until last.
Watering must be done daily for the first week, and during warm weather twice a day. When watering, ensure you are giving the lawn good soaks so the water goes down to the soil underneath. Gradually cut back the watering in the second week to every second day, then the 3rd week every third day, keeping in mind to give extra watering if needed during extreme hot weather.
IRRIGATION
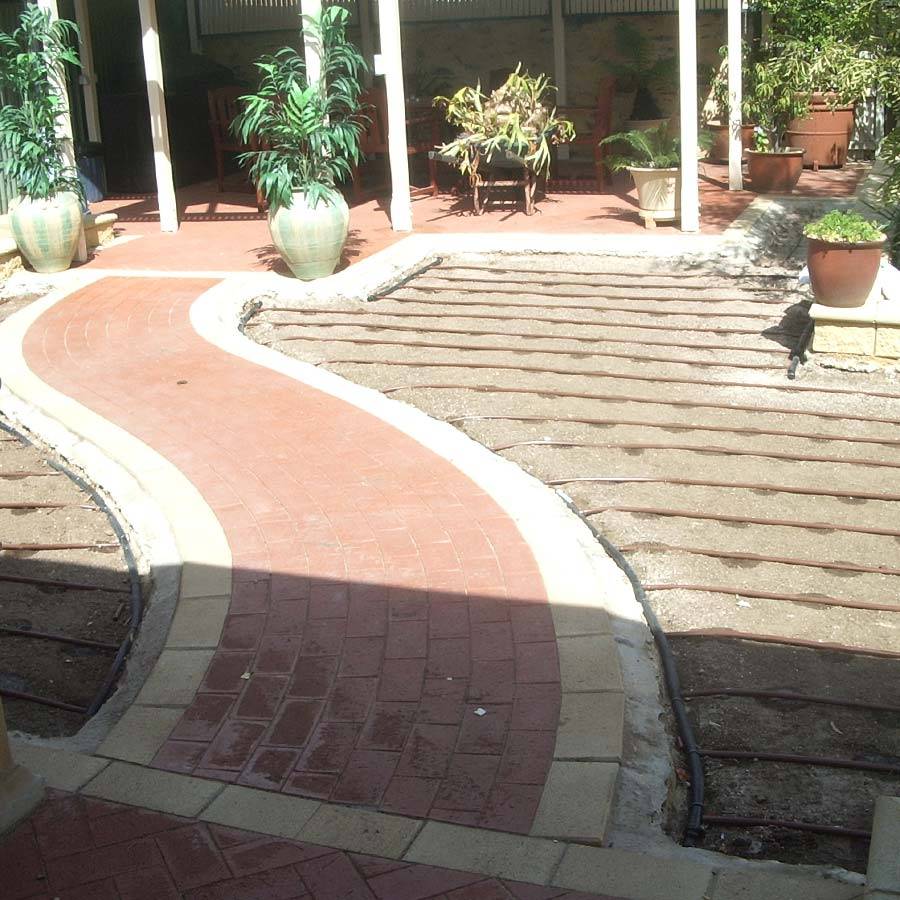
If you are doing irrigation, in particular subsurface, it is suggested to lay at 100mm below the turf, at 30cm apart (even though the irrigation shops will tell you to lay anywhere between 40 and 50cm apart). The lawn will suffer and get uneven watering if it is too far apart. The soil is placed over this and the turf is laid as above. Please note, all lawns require overhead watering when first laid and during the hot weather.
AFTERCARE
Maintenance varies depending on the type of lawn you have chosen. Please refer to each individual turf’s aftercare information, which can be found in the product guides on the Natural Lawn page.
HAVE GOOD WEED CONTROL PRIOR TO SOWING
New grass seedlings are slow to establish and will not compete well with many exotic weeds which establish far faster and spread more rapidly.
HAVE GOOD SOIL PREPARATION AT SOWING
The better the soil to seed contact that is maintained, the higher the rate of germination of seeds. So a fully prepared seedbed will always give higher germination rates than an unprepared or partially prepared seedbed. Even if the area being sown is very small, a well-prepared seedbed will yield better results. – See our preparation and installation guide for turf, it is the same for seed.
SOW THEM AT THE MOST SUITABLE TIME OF YEAR
For all species there is an optimum time for best establishment. It varies from species to species but usually it is from autumn to spring for cool season species, and from spring to early summer for warm season species. The exception to this comes when irrigation is available. -This then allows the sowing of cool season species in summer (albeit with much more effort) or in dry areas. Sowing in winter is possible as the ground will generally stay adequately moist, however washout is possible with excess rains. Seed is quite fickle and will tend to die when it dries out. Make sure whatever area you apply the seed, it has frequent water for the germination period (usually 14-21 days).
SOW WITH APPROPRIATE EQUIPMENT
The most suitable equipment is that which sows the seed to the preferred depth (usually 10 to 15 mm) and which can distribute it out regularly and evenly. It is best after the soil has been prepared and leveled. Follow up with a light rake to allow the seed to sit in the furrows. Then lightly rake over the opposite way to cover the seed, some will still be on the top. For further information, see our Aftercare sheet.
Once you have laid a new DIY lawn, depending on the climate and lawn type, below are a few general helpful hints on how to get it established.
WATERING
It is important to help your lawn take root into the ground to give it the best chance of flourishing. Make sure you are making the most of your watering by doing it for the recommended amount of time and at the correct times of the day.
WEEK 1
Water twice a day, ensuring you are “deep watering” from overhead (using sprinklers). A deep water means the water gets through the lawn and deep into the soil underneath. This encourages the roots to establish. To help you determine how long you will need to provide a deep water, we recommend placing an ice-cream container on the lawn under the sprinklers. Time how long it takes for the container to collect 2.5cm (1 inch) of water. This is considered a deep water.
WEEK 2
Water once a day, continuing to deep water overhead.
WEEK 3 ONWARDS
Water deep once every second day initially, gradually stretching it out to 1-2 times a week, depending on turf and the weather.
Please Note:
- Once your lawn is established, you may revert to using subsurface irrigation however the timing required will be different when “deep watering”.
- Fescue requires more watering than any other grass to both establish and maintain.
On hot days, your lawn may require extra water especially if you can see any signs of stress. Stress presents itself in a variety of ways, including a colour change (particularly grey or purple) or the lawn not bouncing back. If you notice these signs, please water immediately. To access the most recent water restrictions, please visit the SA Water website.
Lawns are like any other growing living thing; they too suffer disease and are prone to attacks from nature in the form of insects and weather. If you see any change in the lawn or are at all concerned, please ring us in the office so we can advise you the best we can, or arrange for someone to have a look.
All creeping grasses like couch, kikuyu and buffalo require regular maintenance such as coring or scarifying to maintain their appearance and manageability.
MOWING
It is important not to mow your new lawn until the roots are established. How long they take to establish can vary depending on the time of the year. A general rule for instant lawn is 7-10 days after laying in warmer months or 3-4 weeks in cooler months. Newly seeded lawns need to be cut approximately 3 weeks after planting, or when two inches in height, with the mower blades set on high and the catcher in place.
After this stage, regular mowing is essential for the long-term condition of your lawn. However, it is important not to mow your lawn too short. This can put your lawn under extreme stress and allows weeds to establish easily. Depending on the time of year and turf type, ideal mowing lengths can differ.
Please Note:
- Always ensure that the mower blades are sharp to prevent damage to the leaf.
- When mowing only remove one third of the leaf blade each mow.
FERTILISING
It is important to fertilise your lawn regularly. Regular fertilising of your lawn will help maintain the health and colour, as well as help prevent pests and diseases. After laying a new lawn, we recommend that you feed your lawn 6 – 8 weeks after it has been first laid, and then once a season.
Akers of Lawn offer a Follow Up Service for after the installation of new lawns, that includes a lawn assessment, regular fertilising, and different treatment options. You can find more details about this service here.


